Cosmetics Product Shoot: Pro Tips and E-Commerce Sales Boosting Strategies for Your Brand
The world of cosmetics is an area where aesthetics and visual appeal are at their peak. For this reason, cosmetic product shootplays a vital role for e-commerce success. High-quality, well-lit photographs that accurately reflect the texture, color, shine and promised impact of products instantly attract customers' attention and directly influence their purchasing decisions. Whether you are looking for a professional cosmetic product shoot Istanbul or cosmetic product shoot Berlin service, whether you are looking for this charming space e-commerce photography course Whether you want to discover for yourself, knowing the secrets of a successful shoot will give you a great advantage. Professional shots increase the prestige of your brand, while learning this skill gives you creative freedom.
So, what should you consider to stand out from your competitors in e-commerce and unlock the true potential of your cosmetics? In this article, we will share cosmetic product shoot By applying these tips, you can showcase your products in the best way possible and visibly increase your sales. Remember, all the stunning cosmetic product photos and videos you see in this blog post were shot by LUX Photo Video Production team with over 20 years of experience. With studios and teams in Istanbul and Berlin, we deliver aesthetic and functional shots that reach your brand's target audience. To see more inspiring examples or to inquire about our services or trainings, contact us at to get in touch don't be shy. Now, let's take a closer look at these pro tips...
1. Cleanliness is Essential: Create a Smooth Surface Before Starting Cosmetic Product Shooting
Any cosmetic product shootThe first and most important step before you start: impeccable cleanliness! No matter how attractive the packaging or the product itself is, the slightest speck of dust, fingerprint or smudge on it can look like a huge flaw in a professional photo. First impressions are crucial in e-commerce, and customers perceive products that look clean and smooth as higher quality, hygienic and new. This has a direct impact on consumer confidence, especially in personal use products such as make-up and skincare.
Therefore, clean the product thoroughly before you start shooting, using a microfiber cloth, optical cleaners if necessary and an air pump. Take a close look at the product and you'll notice that there's a lot of dust and marks that you wouldn't notice with the naked eye. This cleaning phase will save you hours in the retouching stage. Remember, no matter how good the retouching is, a flawless raw image always means much less work and a more natural result.
If you need to move or reposition the product during shooting, always do so with clean gloves (preferably cotton). Carry a damp cloth, microfiber cloth and an air pump with you to immediately remove any new marks or dust that may appear during shooting. Cosmetic product shooting It requires attention to detail, which reflects the professionalism of your brand and positively affects customer perception.
2. Background Selection: Highlight the Product, Support Your Brand Story
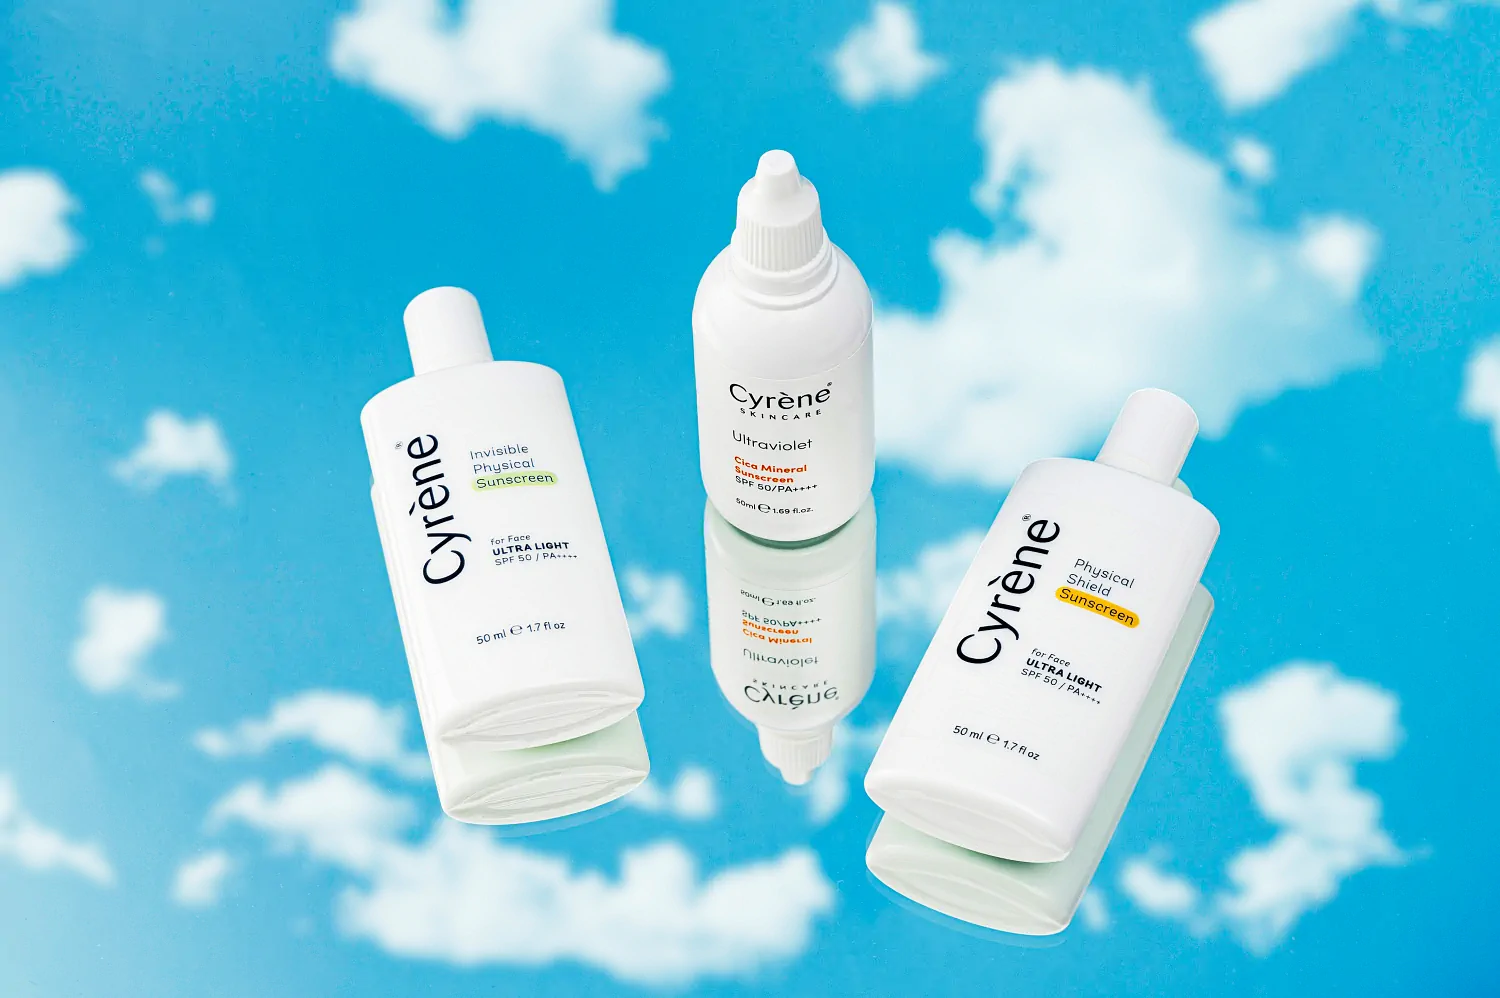
Cosmetic product shootingThe background is as strategically important as the product itself. A well-chosen background emphasizes your product, reflects your brand identity and sets the overall atmosphere of the photo. A wrong choice can push the product into the background or make it look inferior. A background that distracts the customer or contradicts the product can negatively affect sales.
Generally, plain, monochrome backgrounds give the most secure and effective results. Especially for e-commerce sites (Amazon, Hepsiburada, Trendyol, etc.) standard white background (RGB 255,255,255,255) is often preferred and sometimes required by platforms. The white background allows the color and texture of the product to be perceived in the most accurate way, directing the customer's focus completely on the product. As LUX Production, we offer fast and effective solutions for such standard shoots in our studios in Istanbul and Berlin.
However, you can also use different colors or textures depending on your brand identity and the concept of the product. For example:
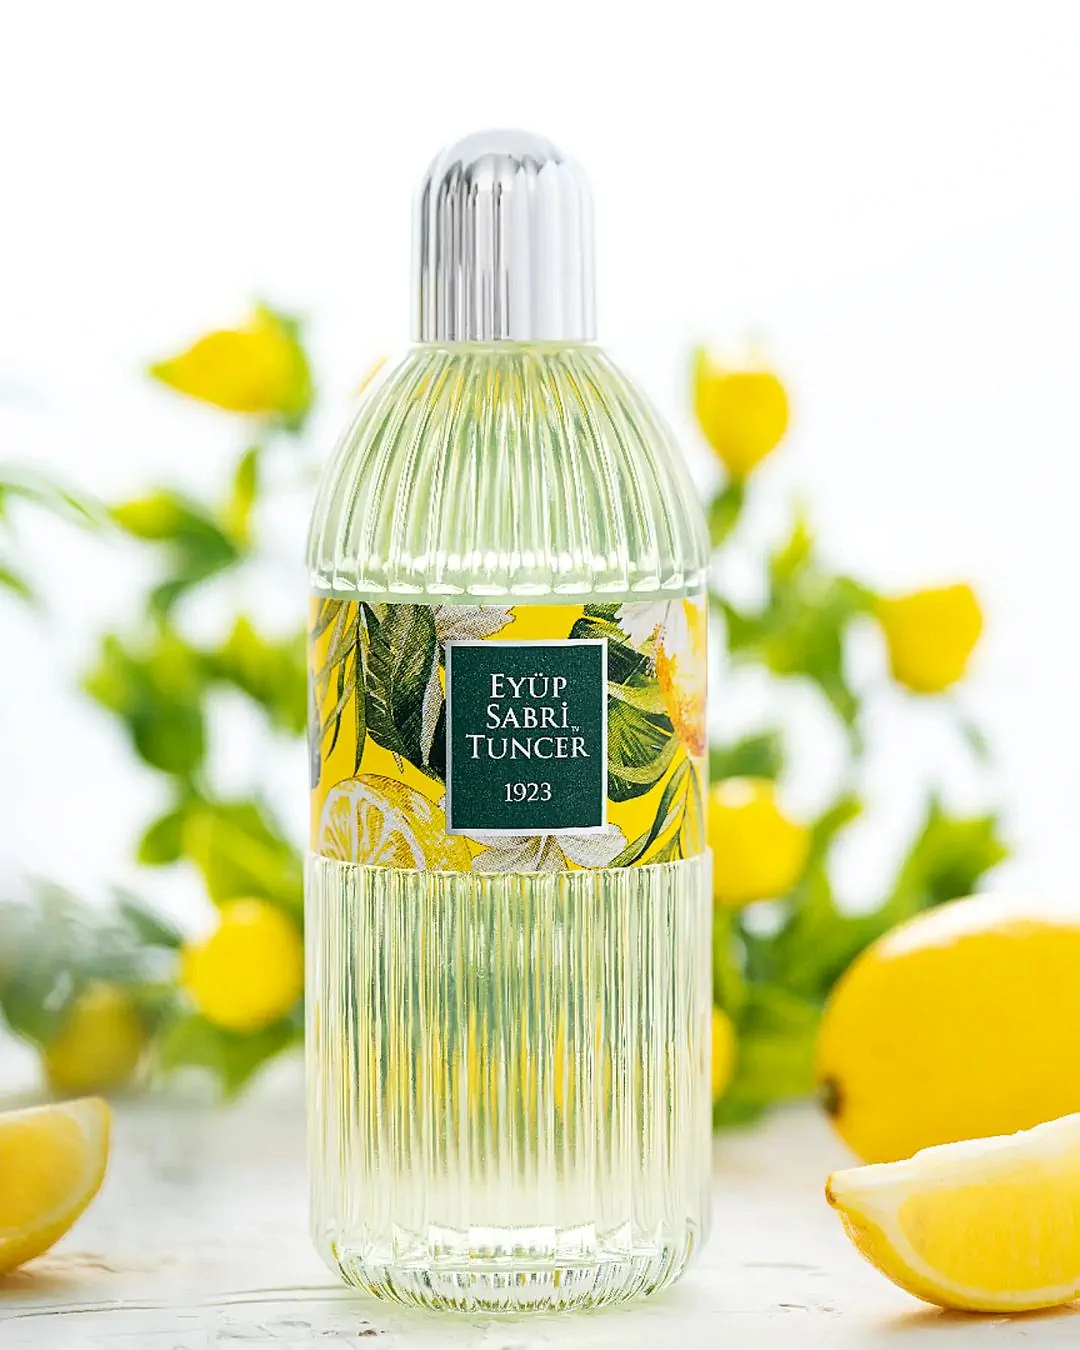
- Luxury Cosmetics Sophisticated backgrounds such as silky black, dark gray or marble texture support the premium perception of the product.
- Natural Skin Care Products: Pastel shades, wood textures, sand or plant elements can emphasize the natural and organic content of the product.
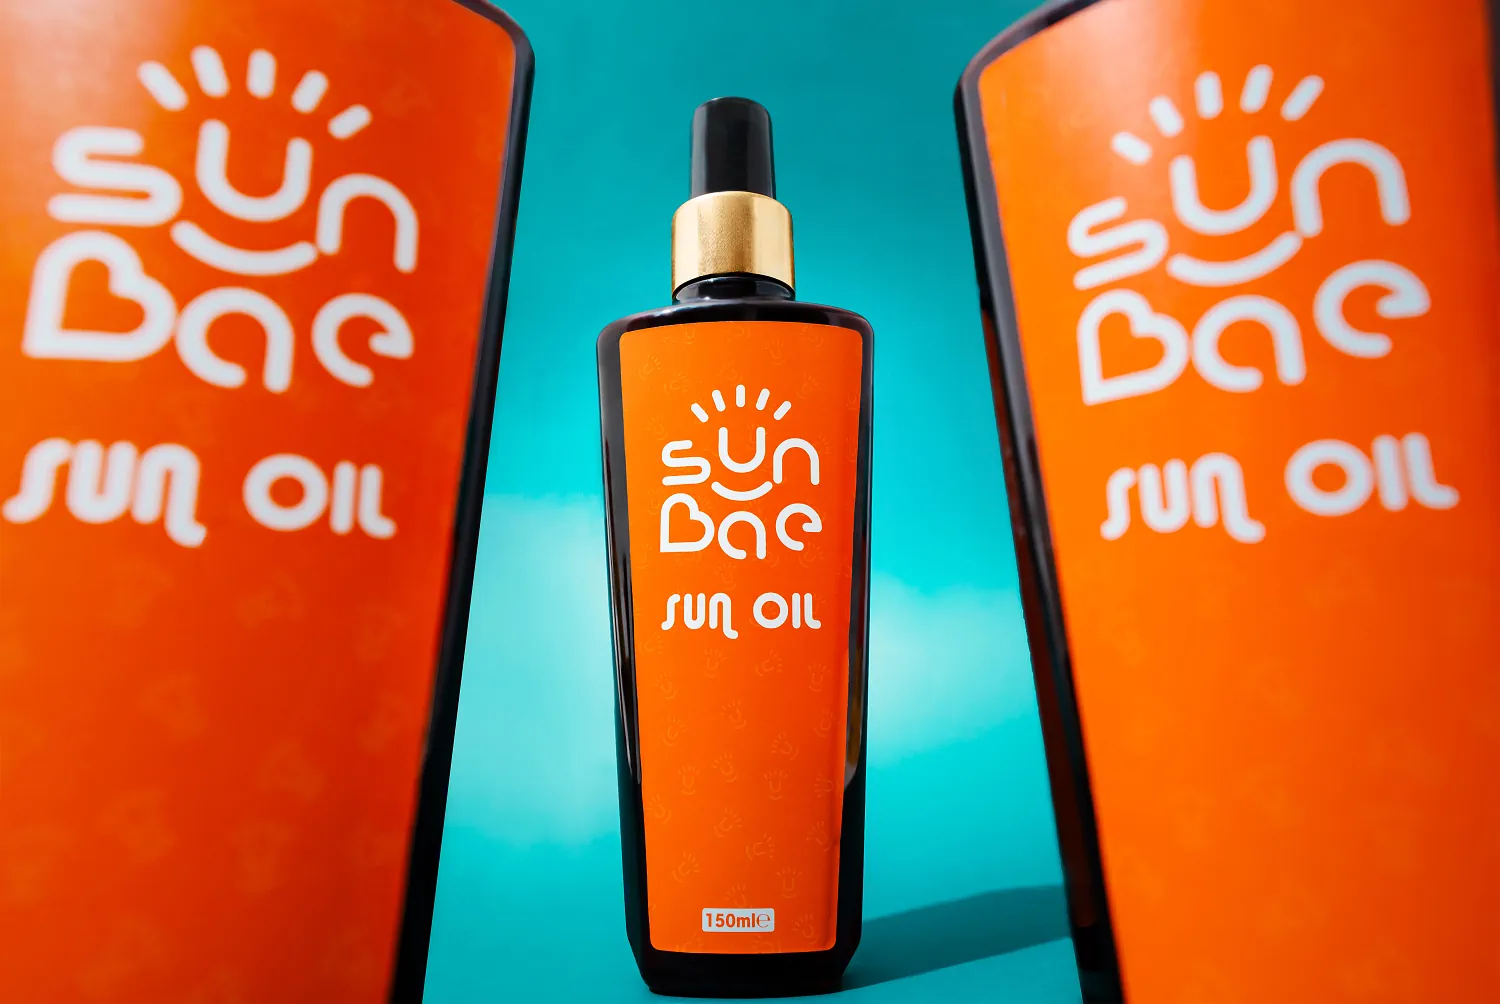
- Young and Dynamic Brands: Vibrant colors or geometric patterns can reflect the energy of the brand.
Remember that colors have different emotional effects on customers and make choices that align with your brand's message. For example, blue can create a sense of trust, green can create a sense of naturalness, and gold can create a sense of luxury. If you are undecided about the choice of background, LUX Production's experienced team can advise you on the most appropriate strategy for your brand. The right background is not only an aesthetic choice, but also a powerful marketing tool.

3. The Art of Lighting: Gradient Transitions and Light Softening Techniques
Whether you work with natural daylight or use studio flashes or continuous light sources, cosmetic product shootlighting technique is critical. Cosmetic product packaging often has shiny, metallic, glass or reflective surfaces. Using direct and harsh light on such surfaces leads to uncontrolled glare, unwanted reflections and loss of form. This is why gradient lighting (lighting where the light shifts smoothly from one side to the other) and light filtering/softening techniques make a difference. A professional cosmetic product photographer for him, light is like a paintbrush.
Why Should We Use Soft Light?
- Controlling Reflections: Hard light creates sharp and diffuse reflections on the glossy surfaces of the product. Soft light makes these reflections more gentle and aesthetic.
- Emphasizing Form and Texture: Gradient light better reveals the curves and depth of the product, showing its texture and volume in a natural way.
- Protecting Details: Instead of harsh shadows and overly bright areas, soft light ensures that all details are visible.
Applied Lighting Techniques:
- Instead of direct, harsh light sources that can cause glare (e.g. naked flash or direct small softbox), use large diffusers, reflectors, paraflash umbrellas or veils that diffuse and soften light over a larger surface.
- Directing the light not directly at the product, but by reflecting it through a reflector or by placing a diffuser panel between the light source and the product, helps to control reflections and better reveal the form of the product.
- Special light tents such as "light tent" or "shooting box" are very effective for creating a homogeneous and reflection-free lighting environment, especially for small cosmetics.
These techniques are basic skills that need to be learned both in professional shoots and when shooting your own shots. As LUX Photography Video Production, we have realized impressive and professional cosmetic shooting examples Cosmetics & Personal Care & Health you can review on our page. Our professional services in Istanbul and Berlin e-commerce product shooting We reflect the light of your brand in the most accurate way with our services.
4. Depth of Field Control: Manage Sharpness and Reveal Every Detail
In product photography, it is often desirable that the entire product is clear and in focus. This is an essential expectation, especially for e-commerce, because customers want to clearly see every detail of the product they are considering buying. However cosmetic product shootIt can also be difficult to achieve the desired depth of field (the distance of the area that is in focus), especially when working close-up on the product or when showing multiple products together. Even if you set your camera's aperture setting (f-stop) to the highest value (e.g. f/16 or f/22), it is sometimes not possible to focus on every part of the product from front to back. This is especially true for cosmetics, which are small in size and intricately detailed. product photographer becomes a challenge for him.
What is Focus Stacking and Why is it Important?
In such cases, professionals often resort to "focus stacking" technique is used. This technique is particularly macro photography and where details are critical cosmetic product shootis invaluable. So, how does it work?
- Multiple Shots: A series of photographs are taken, focusing individually on different parts of the product (from the front to the back). With each shot, you change the focus point millimeter by millimeter so that every part of the product is clear in one photo.
- Software Integration: These photos are then combined using specialized software (Adobe Photoshop, Helicon Focus, Zerene Stacker, etc.). This software automatically detects the sharp areas in each photo and combines them into a single image.
- Perfect Clarity: The result is a single photo of the entire product in perfect clarity, from the front cover to the back label.
This technique makes a difference, especially when shooting small and detailed cosmetics for e-commerce - the tip of a lipstick, the shimmer of an eyeshadow palette or the fine engravings on a perfume bottle, for example. When your customers can clearly see every detail of the product, their purchasing decisions are strengthened. At LUX Productions, our teams in Berlin and Istanbul can handle the most complex cosmetics photo shoot Even in their projects, they skillfully use such advanced techniques to add value to your brand.
5. The Power of Different Angles: Free Your Products from Monotony and Tell a Story
A successful cosmetic product shoot One of the golden rules is variety. Photographing the product from the same angle over and over makes the results monotonous and boring. Seeing only one or two angles of the product on an e-commerce site doesn't give customers a complete picture of the product and can cause potential buyers to lose interest. Shoot from as many different angles as possible to give the customer a complete idea of the product, keep visual interest alive, and even tell a story:
Which angles should you shoot from?
- Eye-Level Shooting: It is the most standard and natural looking angle. Presents the product as it is.
- Top Lay (Flat Lay): It is especially popular for showing multiple products, a collection or product texture, packaging and complementary accessories (brushes, flowers, fabrics). It's a great option to reflect the aesthetic language of your brand.
- Low-Angle: It can give the product a more imposing, powerful and iconic look. It can be especially impressive for prestigious and luxury cosmetic brands.
- Close-up (Macro) shots: Ideal for highlighting a product's texture, shimmer (e.g. a highlighter), brush detail, applicator or a special component. These shots highlight the quality and unique features of the product.
- Diagonal Angles It can add dynamism and movement to a photograph, offering a more modern aesthetic.
- Lifestyle Shoots: These are shots that show how the product is used in daily life and how it looks on the skin. This allows customers to make an emotional connection with the product.
Also, if you want to offer an interactive experience to customers, you can create an interactive experience that shows the product from all angles. 360 degree product photo shootalso consider. This technology gives the customer a full visual experience of the product, especially for high-value cosmetics. Trying different angles allows you to create a richer visual set and helps you communicate your brand's message more effectively by improving your creativity. As LUX Production, e-commerce product photography we design multi-angle and dynamic shots tailored to the needs of businesses in Istanbul and Berlin.
Below is a sample prepared from different angles and concepts cosmetic product shoot video and for more inspiration Youtube Channel you can follow.
6. Model Utilization: Bring Product to Life and Engage Customers
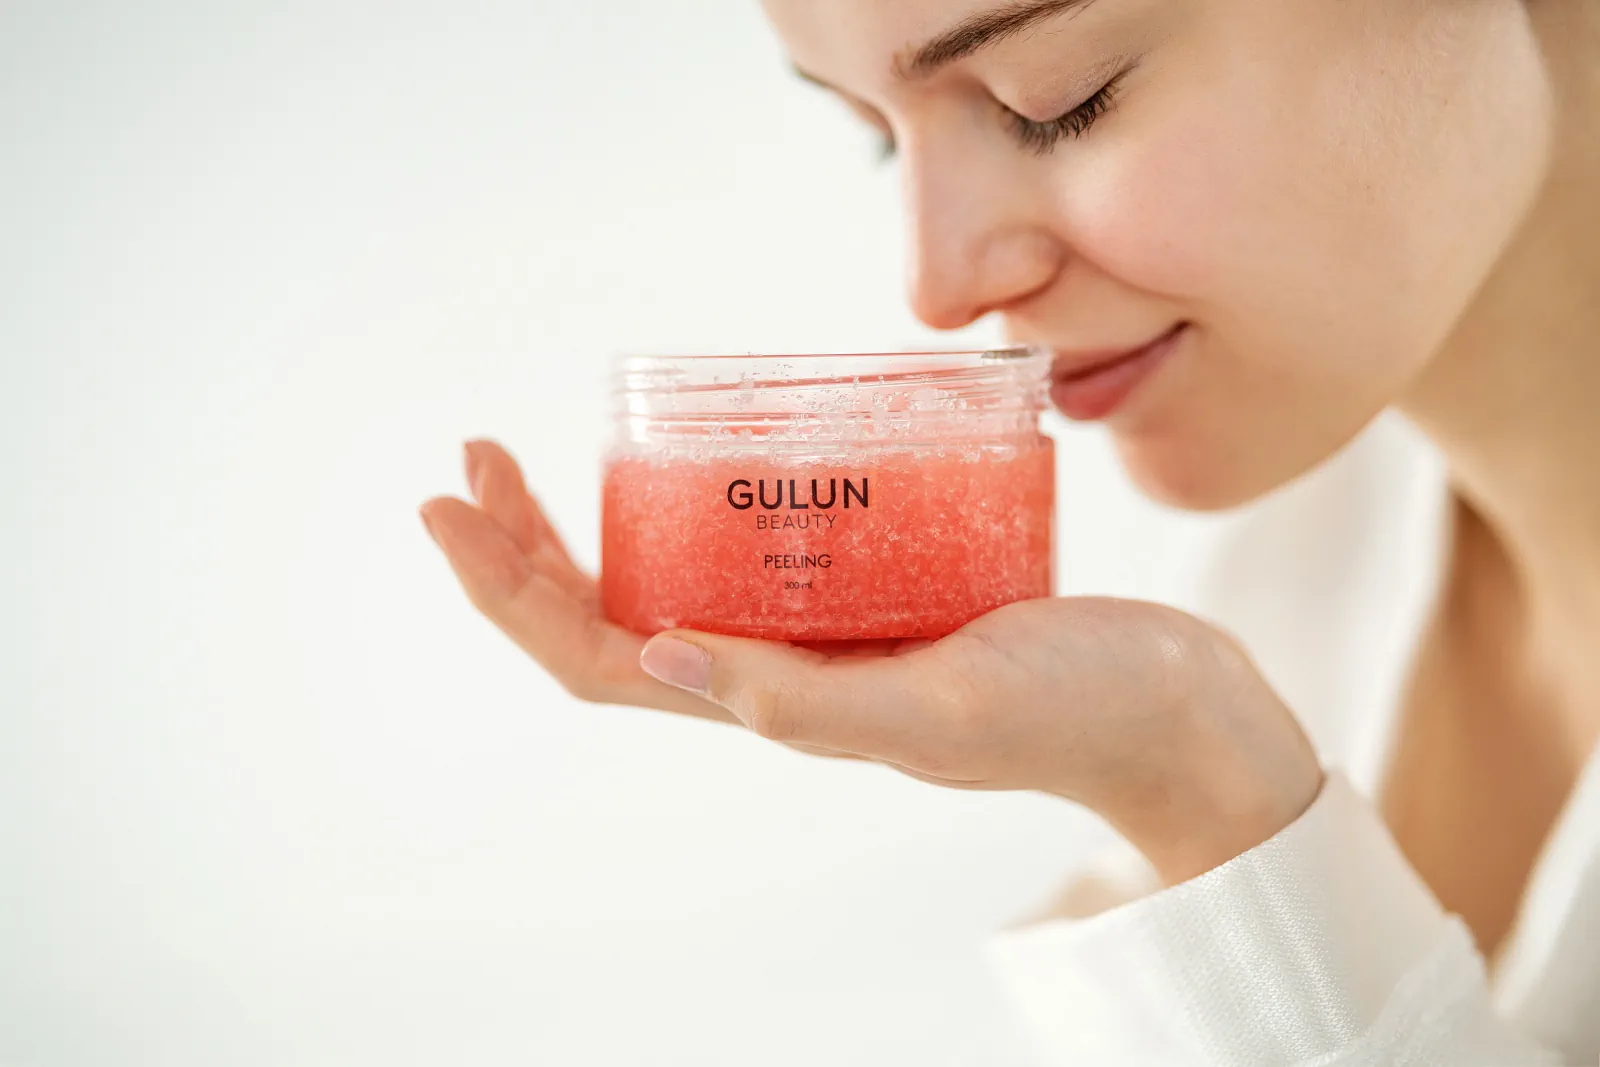
Cosmetic product shootingUsing a model is one of the most effective ways to add professionalism to your brand and showcase how your product looks or performs in real life. Especially when it comes to makeup, skincare products, perfumes or hair products, seeing the product on a model makes it easier for customers to connect with the product and imagine themselves with it. Model shoots are invaluable for showing how the color of a product looks on different skin tones, its texture, the effect it creates or how a hair mask adds shine to hair.
Advantages of Modeled Shoots:
- Actual Use Case: It shows how the product is used and how it looks on the user.
- Emotional Bonding: It creates an emotional connection with the product through models and helps your target audience identify with the model.
- Color and Texture Demonstration: It clearly shows how lipstick looks on the lips, foundation on the skin or eyeshadow on the eyes.
- Brand Storytelling: With the selection of models, styling and overall concept, you can communicate your brand's identity and story in a stronger way.
However, the point to be considered in modeled shots is that the model or styling should not overshadow the product. The focus should always be on the product. The model's poses, expressions and overall look should be in line with the product's message. For example, a minimalist and fresh look may be preferred for a natural skincare brand, while a more daring and artistic approach may be adopted for an ambitious makeup brand. Striking this balance and directing the model correctly requires professionalism. cosmetic product shoot for an experienced team is often the best approach. As LUX Production, fashion lookbook shoot and beauty shots With our expertise in the field, we design and implement modeled shoots that tell your brand's story in the most effective way. We offer customized solutions with our models and make-up artists in Istanbul and Berlin.
7. The Final Touch: Achieve Perfection with Professional Retouch
It's a great one cosmetic product shoot So you've done it, now what? The next stage, and at least as important as shooting, is image processing, or retouching. In cosmetic photography, the expectation is usually perfection. On e-commerce platforms, consumers don't want to see even the slightest flaw in product images, which can create a negative perception of the quality of the product.
What is done during the retouching process?
- Detail Cleaning: The smallest dust particles, scratches, fingerprints or micro imperfections in the product packaging are meticulously removed.
- Color Accuracy: The colors of the product are matched to the shades of the brand or the actual color of the product. Especially in cosmetics, color consistency is vital for customer satisfaction.
- Brightness and Contrast Settings: The overall brightness, contrast and sharpness of the photo are optimized, making it more visually appealing.
- Skin Retouching (for Modeled Shoots): In model shoots, the skin is smoothed, but without losing the natural look of the model and without overdoing it.
- Reflection Control: Unwanted reflections on glossy surfaces are softened or eliminated.
Retouching requires expertise and a keen eye for professional photo editing software such as Photoshop. The goal is to perfect the photo without losing its natural look. Excessive retouching can make the product look artificial and undermine its credibility. Therefore, a balanced and realistic approach is essential. If you don't have experience or have limited time, it's best to leave it to professional retouchers or the photo agency that did the shoot. If you are learning to take your own shots, you should also learn basic retouching techniques. e-commerce photography course It is important to learn in context.
As LUX Photo Video Production, we have been working professionally for countless brands for more than 20 years. cosmetic product shoot and we know the trends and techniques in this field. Our teams in Istanbul and Berlin guarantee the highest quality standards also in the post-production process. Whether you want stunning photos and videos for your products or you are looking for training to improve yourself in this field, we are happy to help you! LUX Production is a professional team of professionals to increase the digital visibility of your brand. product photographer Istanbul and product photographer Berlin is at your side with its services. Contact us for your questions, projects or training requests. bilgi@luxproduksiyon.com You can reach us via e-mail. Or you can contact us at Whatsapp Line you can contact us directly.
Also if you need more concept-oriented advertising shoots for your cosmetic products, Advertisement Shootings You can review our portfolio on our page and get in touch with us to develop customized projects for your brand! Remember, a professional e-commerce photographer is the surest way to increase your sales and brand value.
Sources:
https://fixthephoto.com/makeup-product-photography.html
https://visualeducation.com/cosmetics-makeup-product-photography-tips/
https://tr.wix.com/blog/makale/urun-fotograf-cekimi
https://spectrum-brand.com/blogs/news/top-10-easy-photography-tips-for-makeup-skincare-businesses